Sewing isn't something that I really do very often (knitting is more my thing), but occasionally I'm inspired to try my hand at it. Last fall when I went on our Misery in the Mountains Retreat I decided to bring along a hand-quilting project instead of my usual knitting.
Well, to be perfectly honest, I should say I brought it "along with" my usual knitting. It's not really possible for me to travel without yarn.
I just can't.
I start developing nervous spasms.
Anyway, regular American block quilting doesn't usually appeal to me due to it's geometric configuration (geometric shapes make me cringe; give me swirls and loops any day over sharp angles), so I much prefer the organic fluidity of Hawaiian quilts.
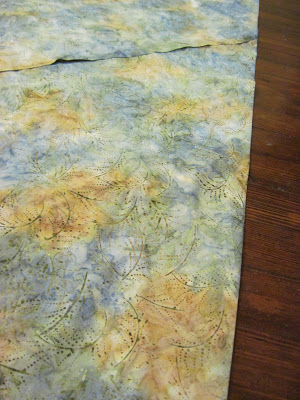
To begin my king sized quilt, I used some beautiful batik fabric for my top design, which would be stitched onto a cotton background.
The pattern I ordered was printed on both sides of the paper, which meant I had to first transfer it onto pattern fabric before I could use it. I've never done this before, but I can imagine it would be very useful to transfer other well-used patterns to this sort of fabric, as it's much more durable than the thin paper that patterns are usually printed on.
After lots of painstaking folding and ironing, I had my large "sheet" of fabric folded into a triangle with the pattern placed at the center triangle fold. Hawaiian quilts are basically cut out the same way one cuts out snowflake patterns, with the fabric being folded several times from the center and the design cut through all the layers.
Cutting it out was a bit nerve-wracking, because if I made a mistake it would ruin the entire top fabric.
Once I got it cut out (thankfully without any errors), it had to be pinned exactly center onto the bottom background fabric. This also took a good hour to pin, as it had to be precisely centered in order for it to work.
You can't quite tell from the photograph (I had to stand on a chair in order to get the entire quilt into the frame), but I then thread basted each and every section to the background with bright red thread. I had read that using an ugly thread helped keep the sewer motivated to get the top appliqued on so that the ugly thread could be removed.
I have a feeling I'll be looking at ugly thread for several years.


1 comment:
WOWSERS! What a project - but oh, so beautiful! It's an amazing pattern, but I do not envy you all that stitching! ;) It will definitely be something you can be PROUD of when you finally finish. Can't wait to see that pic when the time comes. Will you cut out more pieces (ie for corners, etc?), or is it going to just be the center pattern?
Post a Comment