Showing posts with label Gift. Show all posts

Friday, May 3, 2013

Juneberry Shawl in April


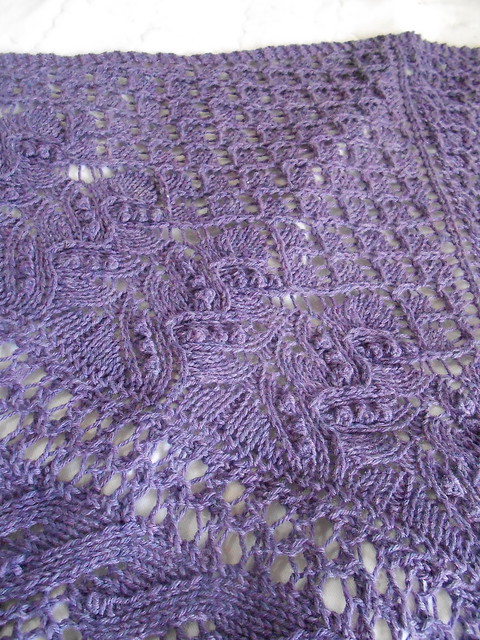
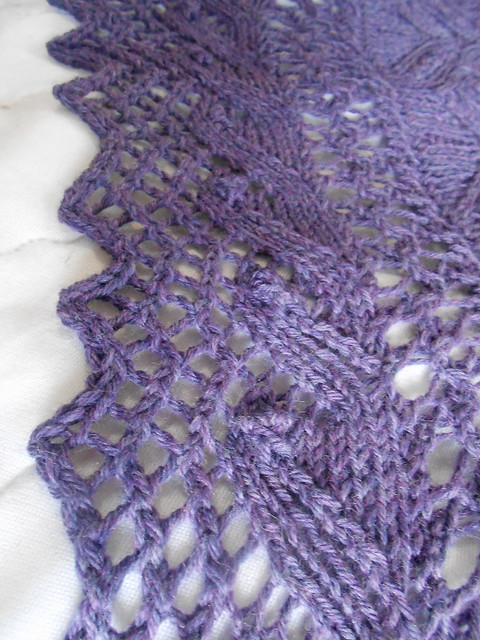
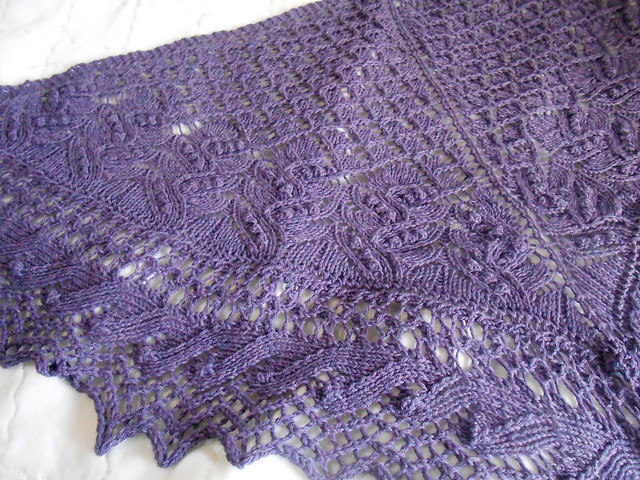
For my dear Mum's birthday in March, I knit her a shawl from her own alpaca yarn, and I so fell in love with the pattern I right away cast on for another shawl (this one is a gift for someone else and she knows who she is.)  I finished this one in April.


This almost never happens with me.  I like the new, the next, the onward.


Somehow, though, this pattern keeps me knitting.  Just when I get bored of one section, it's time to switch to another.
 
I have discovered that this pattern works best with solid or lightly heathered yarns.  Anything too "busy" hides all the detailed stitches -
 
- and who would want to hide this?!
 
 
(Pattern specifications and yarn information can be found on my Ravelry page.)

Monday, March 18, 2013

Happy Birthday Mum!


My mum had a birthday this past week, and for her birthday present I knitted her a shawl from her own alpaca fiber.

My goodness, this stuff is so lovely and soft!  Alpaca is such a light weight, but extremely warm.  I made the mistake of wearing it around the house for an hour, and ever since I've had extreme alpaca envy.

This pattern is Juneberry and it's knitted with a worsted weight yarn, making it a little bit faster to work with.  However, since it's fairly intricate I wouldn't call this a speedy knit either.

I just loved knitting this.  Wonderful fiber, wonderful pattern, for a wonderful person!

(Click here for specific knitting information)

Monday, January 16, 2012

Consolation Gift for Joshy

I had started working on a Christmas gift for my brother Joshy last summer, and when I got it done, I was thrilled with how it looked.

It was amazing.  It was trendy.  It was practical.

Then I made the mistake of asking Handyman to model it so I could get pictures.  He did.  Then he refused to take it off.

(Now please understand that while I might act all huffy, in reality I was absurdly pleased.)

This was wonderful, because then I didn't have to knit anything for Handyman for Christmas, but then that left me without anything for my brother, and I had promised him something hand knit.  It was December 2.  Things were looking grim.

With flying needles and lots (and lots) of caffeine, I somehow managed to get his gift done in two weeks.  It's even better than I could have hoped, and I think he'll get lots of use out of it (he lives in Maryland, where I'm told it's cold.  I'm skeptical, as "cold" to a Hawaiian isn't the same as "cold" to insane people who live in the Frigid North like me.)

This is the Alberta Vest by Jared Flood, and what an amazingly well-written pattern it was!  It's knit in the round as a tube (for non-knitting muggles that means it's easy knitting and fast because there's no purling required) and then armholes and the neck are cut open using steeks.

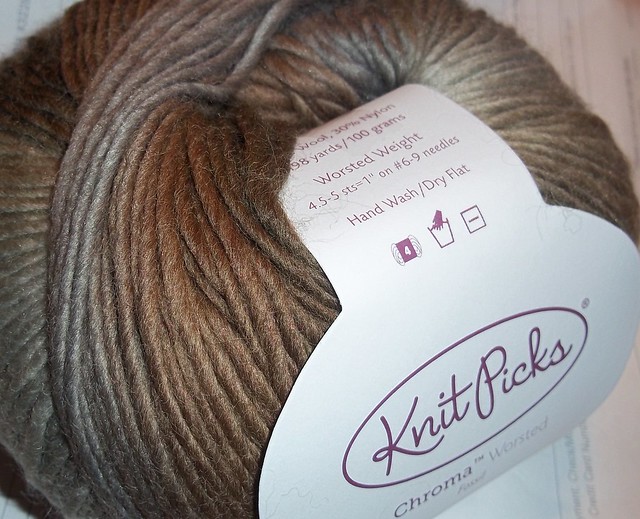
I used some Cascade 220 in a dark gray that I already had in my stash, and purchased some Chroma Worsted from Knitpicks.  The yarns are striped every two rows, and it was fun to watch how the Chroma slowly blended colors.

(Chroma is a fantastic yarn and I'd highly recommend it.  I'm not sure how much it might pill though, so I'd recommend using a rather tight gauge if you're working with it for garments.)

For the ribbing on the bottom, armholes, and neck, I was able to use up some dark heathered black yarn from my stash.  Double bonus!

Learning how to steek (cutting into the knitting) was the last thing on my Bucket List of Knitting Techniques, and I was thrilled with how easy it was.  I have to say, I was definitely holding my breath while I did it, but once I got it done I was so impressed with how easy it was and how useful it could be!

Steeking can be done either with a crochet hook or a sewing machine, but since the steeks were for the armholes and neck, both of which should have some stretch, I decided to try the crochet method.  I'm very glad I did.  I love the way the inside looks!

Next time I do a steek, though, I'm going to use a smaller crochet hook.  It's nothing that anyone else but me would probably notice, but the crochet edges pucker a tiny bit.  It didn't make any difference once the fabric was tacked down.

I hope you like it Joshy! 
Friday, December 23, 2011

Mitered Drape Vest #2


I made this vest for my Mum awhile ago, and I thought another one might make a nice Christmas present for my sister Angie.

(Sorry for the blurry photos.  I tried taking pictures with my camera's timer, but I suppose the camera kept wobbling after I pushed the button . . .)

It's the Mitered Drape Vest by Jane Slicer-Smith, and is one of those weird knits that are extremely simple to make, yet when you're doing it the first time it seems to make no sense whatsoever.  All those boring knit and purl squares made for the perfect knitting-during-church project.

(Yes, I knit during church.  The pastor and I have an understanding about this and everyone else in our congregation is already fully aware of my eccentricities.)

I knit this with some absolutely lovely 100% bamboo yarn that draped perfectly for this sort of project.  I was seriously considering keeping it for myself, ha ha! So soft and, well, drapey!

Send me a picture sometime Angie! 
(If you're interested in the knitterly details, see my Ravelry Page here.)

Sunday, December 18, 2011

Three

 . . . Christmas gifts done and wrapped!


First up are some dishcloths.  I know they're rather provincial, but when it comes to downright practicality you can't much beat a hand knit dishcloth. 
(Pattern is called "Granny's Favorite", and I alternated solid 
cotton yarn with a variegated skein every other row.)

They're indestructible, pretty, and really help brighten the experience of dealing with disgusting dirty dishes.

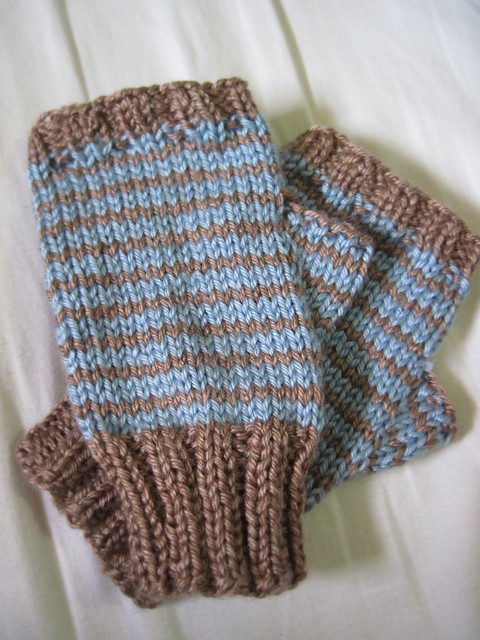
Next up is another pair of fingerless mittens.  Seriously, if you haven't tried a pair on, you really must.  We live in the Frigid North, but even up here these babies do a great job of keeping your hands (and even fingers!) warm while allowing use of your digits.

 This pattern has ribbing all the way up that make it fit nice and snug, so it can fit a lot of different hand sizes.

Best yet, it doesn't use a lot of yarn so it's a great worsted weight project to finish off that ball of heathered black yarn that's been languishing in the ol' stash.

Finally, I have another scarf.  Pretty wild, huh?!

I have to tell you, while I was knitting this I felt pretty psychedelic and "far out".   These are not my colors at all, so this was an interesting experience.  The yarn was difficult to work with but the finished product is lovely and sproingy (yes, that's an official knitting term.  It's self explanatory).  Wearing it is a bit like being hugged by an enormous squishy bath toy.

The pattern is called Dropped Stitch Scarf and is nice because it doesn't matter which side you look at.  A lot of knitted scarves have a "right" and "wrong" side, which bugs me, because scarves tend to flop every which way without regard to fashion sense or latent OCD tendencies.

Okay, now time to get them in the mail!

Saturday, December 17, 2011

75 Yard Mitts

My friend Bonnie recently had a surprise birthday party, but as this was during my desperately-ill stage of pregnancy I wasn't feeling up to going.  I felt very badly about missing, but thankfully I was able to whip up some nice warm fingerless mitts to put in her gift bag.  

For some reason, this pair came out a little larger than the last pair, despite the fact that I used the same sized needles.

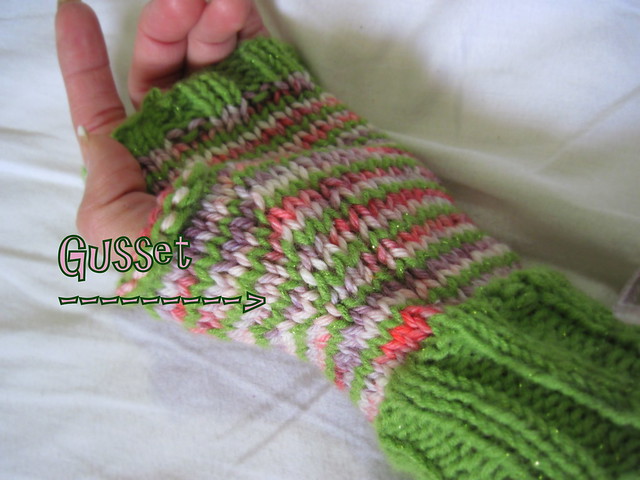
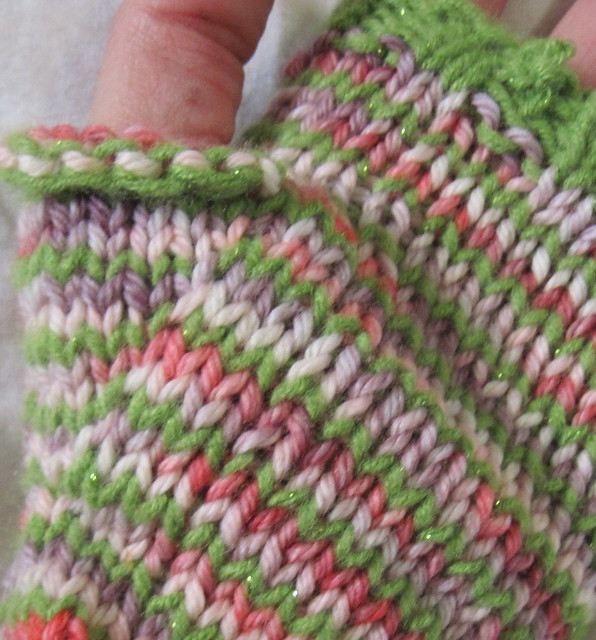
Hee hee, I couldn't resist showing you another gusset.  I love gussets.
(I know, I need to get out more.)

Wednesday, December 14, 2011

RAWR!!!!!


I'm trying to keep expenses to a minimum this year (like everyone, I know!) and hand made gifts are often cheaper than purchased ones.  My kids especially love knowing that their gift was made by Mom just for them.  (I really hope that never changes!)

Peter is my Dino Man, and he loves anything ferocious and mean.

(When Peter was five his favorite movie was Jurassic Park.  I know you might be shocked that I'd let my five year old watch it, but he wasn't scared in the least.  As Handyman said, "Jurassic Park is only scary if you're worried about the humans."  Peter associates more with the ferocious dinosaurs in the movie than the wimpy humans running around screaming.)

So anyway, for Peter's Christmas gifts this year I decided to make him screen printed hoodies ($4 on sale at Menards!) designed just with him in mind.  (I personally loathe hoodies but my son adores them and would never wear anything else if I let him have his way.)

This first one I designed with a bit of a minimalistic "Mini Boden" idea in mind (if Mini Boden was a ferocious man-eating dinosaur, of course).

The second one is my favorite and I'm absolutely thrilled with how well it came out.

For both tees I just googled "dinosaur image" and searched for an image I liked.  Once I found one, I just copied the image into a word document and stretched it to fit a regular sheet of paper.  I printed out several copies just in case I needed more than one for the layers (as in the second hoodie).  Then, I taped my image on top of my freezer paper and cut out the image (remember, when you're stenciling you need the negative image, so keep the outside of the image intact).  You can use scissors but for the more detailed images and the letters I found I liked using my razor pen best.

I won't go into too much detail about freezer paper stenciling, because there are SOOOOO many wonderful tutorials out there, but here are a couple of tips I've discovered that seem to work well:

* Be willing to layer your image with more than one color and texture.  For instance, perhaps a word could be cut out of fabric instead of just stenciled.  It adds a nice finished touch.  (Like the Hawaiian shirt I did for my dad last year)

* When you're ironing on the freezer paper, it's best to do this on a hard surface.  An ironing board usually has some padding, and I've found it's harder to insure that all the edges of your paper are adhering to the fabric if you iron it on the ironing board.  A hard kitchen table works better.

* Take the time to work in stages.  Your first layer of fabric paint should be fairly thin so it doesn't run under the stencil by accident.  Once you've applied your first layer there's not much danger of the paint seeping.
  
* Dry your paint quickly with a blow dryer.  If you're patient, you can just let the shirt sit for a few hours until it's dry before starting the next layer, but I'm not patient (at all) and topping off the paint with a heated blow dryer works in a few minutes and you're ready to add the next layer.  (BEWARE!  Don't do this if you are using a puffy paint or an outline, as it can splatter.  Only do this for brushed on paints).

Have fun with it, and if you do decide to try this, I'd love to see what you come up with! 

Sunday, December 11, 2011

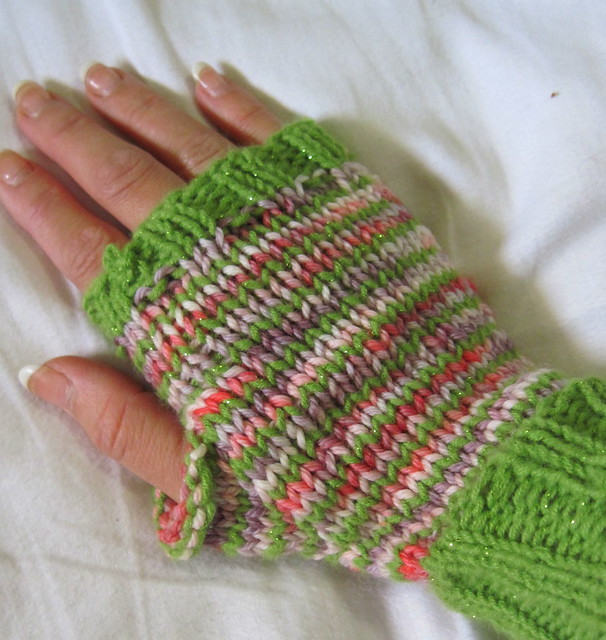
Fingerless Mittens

These are fingerless gloves that I knitted for my friend Nikki's birthday party.  Well, actually, at the time I'd only gotten one glove done so she was a bit flummoxed to find only one glove in the bag when she has two hands, but I explained that I was working on the other one.


(Knitters work off of a completely different time table.  It has something to do with alternate realities and wormholes and spacial distortion.  Just take my word for it.)

I love the way the thumb gusset grows out of the knitting around the palm.  I know it officially proclaims my status as Dork, but I just find a well-knitted gusset fascinating.


(Plus it's just fun to say "gusset".  And "schappes". And "smock".)

I'll shut up now.


Monday, October 10, 2011

Pumpkins for a Lil’ Pumpkin


IMG_4541
My SiL Kathy had her baby shower recently, and for the baby gift she requested a pumpkin hat for her baby girl, who is due any day now.
IMG_4530


Although I was hoping to find something a bit softer than acrylic yarn, I couldn’t find anything local that was the precise “pumpkin” shade that was also merino wool.  I ended up using Vanna’s Choice yarn from JoAnn fabrics.  It’s not my favorite, but I’m happy with the finished result.

The hat pattern I used is the Berry Hat, which I modified to look more like a pumpkin by working a K3, P2 ribbing after I did the rolled brim.

IMG_4535
Of course I couldn’t just stop with a hat.  After all, Kathy’s expecting a girl, and everyone knows a truly fashionable girl has a matching hat and shoes!
IMG_4531


PumpkinCollageFor the booties I used a mish-mash of several patterns, which would most likely bore anyone but non-knitters, and probably the knitters as well.  If you are really that interested, you can view the detailed changes I made on my ravelry page here.

Saturday, October 8, 2011

Lynn's Birthday Socks


So my sister Lynn had her birthday in early September, so I decided to knit her a pair of socks as a gift. 

I'm sure she was shocked.  After all, I gave her socks last year, and the year before last (and maybe even the year before that?).  I'm not very adventurous when it comes to gift-giving.

I am so ashamed to admit that although I finished knitting the socks on time, they are still packaged and waiting in my van.  Considering that my sister lives almost 900 miles away from me, this is not a good sign.

I have every intention of taking them to the post office today and mailing them priority.  I have set it as a priority on my list.

Right after I find my energy . . .

Maybe I'll hang on to them until Christmas and they pull them out with a cheery "surprise! bet you thought they were lost!" which I'm sure won't work because by then they most likely will be lost.