Showing posts with label tutorial. Show all posts

Monday, December 10, 2012

Orchid Care


I feel a bit self-conscious posting about orchids, as out of everyone in my green-thumb family, I'm the least qualified.


- However, I am the only one with a blog.

(Okay, my Mum has a fabulous blog as well, but she only posts things about bugs and slugs and slimy things.  Hi Mum!)
 
So, here's what I do for my orchids which seems to work fairly well.  First, when I purchase an orchid, I repot it into a large glass bowl.  You can find these for cheap at yard sales or thrift stores.  My theory is that the glass 1) allows light to the roots which is important for orchids, and 2) keeps the soil moist.  In the Frigid North the humidity level in the winter can be a killer for moisture-loving orchids.

If you need more potting mixture, you can purchase orchid bark at most plant nurseries or even at Wal-Mart.  It's not a good idea to use regular soil though, as too much of it will cause the roots to rot.
 
Place your orchid in sunny spot out of direct sunlight.  (The orchid and the family cat might vie for the sunny spots).
 
Water your orchid twice a week with two ice cubes (yes, ice cubes).  Be careful when you are putting the cubes into the bowl that they don't sit on a leaf, as the cold could cause the leaf to fall off.
 
That's it!  Super easy, and best yet, your orchid should bloom up to twice a year and stay in bloom for a month or more, usually during the most miserable (weather-wise) times of the year!


Do you have any orchids or exotic plants?  What tricks do you use to keep the happy?

Monday, September 3, 2012

Homemade Applesauce Tutorial


Fall is such a wonderful time of year, and if you're lucky enough to have a lot of apples, you might want to make some applesauce.

(This is an especially good idea if you have apples that might be a bit too tart to just eat fresh.)

Start with a lot of apples and a very happy baby.  (Happy baby optional).

Peel and core all the apples, or as many apples as you can fit in your large stockpot.  An apple corer like this is invaluable if you have a lot of fruit to get through. 

A cute helper is also invaluable too, but I wouldn't recommend going to the store and grabbing one.  Stick with grabbing an apple corer.  Much safer.
  
(If you leave the peel on the apple and your apples are very red, you will get "pink applesauce".  Be aware that this will add a few minutes to the cooking time and I wouldn't recommend doing this unless you have organic apples.)

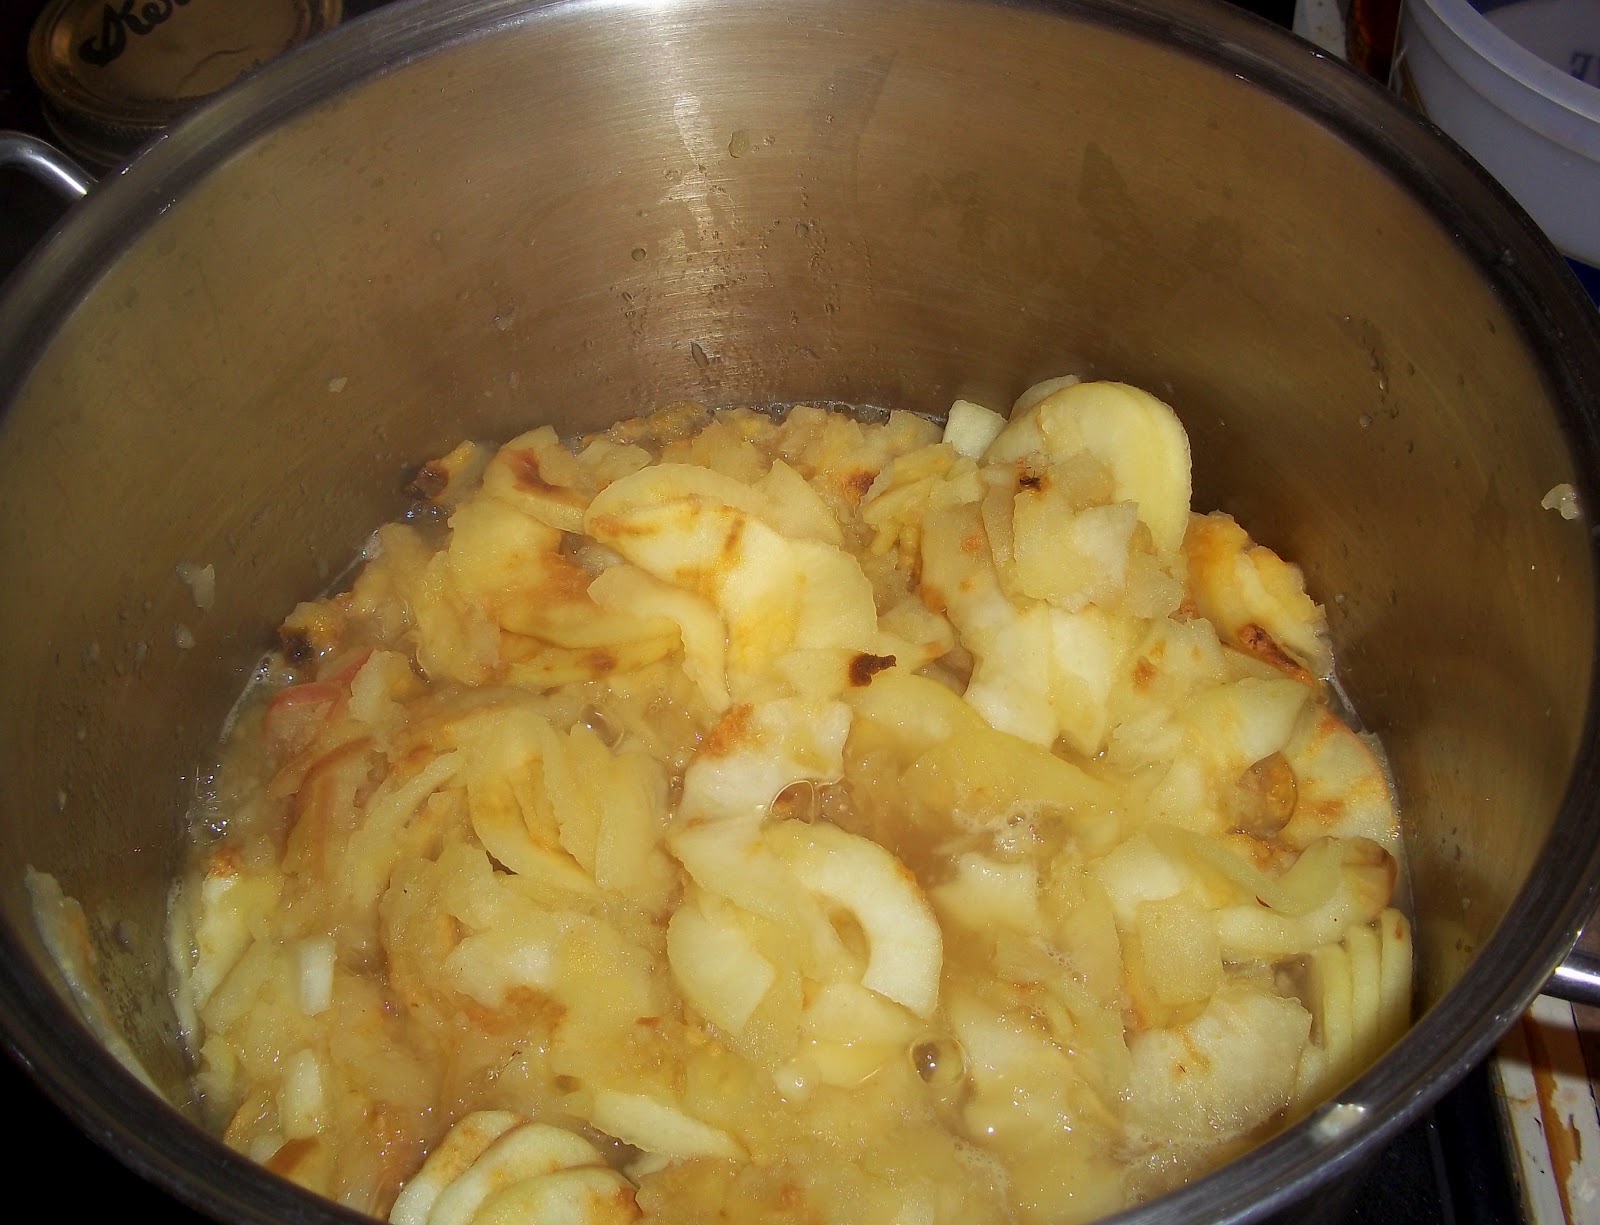
Once you have them in the pot, add about two inches of water.  Add more water if you like your sauce more runny, or less if you like your sauce thicker.  (Just be warned, if you don't add enough water your sauce is more likely to burn.)

Stirring occasionally, cover and cook on high until the apples are nice and soft, about 20 minutes or so.

Add your ingredients.  Generally for 16 cups of applesauce I add 2 cups of sugar, 1 teaspoon of cinnamon, 1 tablespoon of lemon juice, and 1 teaspoon of salt.  If I were making this purely for my own tastes (and not for those of my picky but boring-palated family) I would also add 1 teaspoon of nutmeg and 1/2 teaspoon of allspice, as well as a pinch of ground cloves. A bit of ground ginger might also be a nice touch. 

(Please note that the amount of sugar will depend on the sweetness of your apples.  Start with 1 cup of sugar and add more to suit your taste.)
Hmm, perhaps I'll make a small batch just for myself . . .

I like to use an immersion blender, but you can also transfer your sauce to a blender or food processor if you want it to be smooth.  Otherwise, your apples should be soft enough that you can blend them fairly well by just using a sturdy spoon.

If you have enough sauce that you want to can it, ladle the hot sauce into clean mason jars, leaving about a 1/2 inch of head space.  Cover with new (and washed, of course) lids and rims and put in a water bath canner for 20 minutes.  You can also use a pressure canner, but I never do it that way as for me the water bath method is easier.

All done!  Let the jars sit on the counter until they cool before storing in your pantry.


(I realize that there are different was to make applesauce and lots of cool gadgets that might make things easier.  This is just how I do it and I thought I'd share my method with anyone who might be interested.  Let me know if you make some and I'll commiserate with you on the state of your kitchen!)

Monday, January 30, 2012

Layered Freezer Paper Tee Tutorial


There are already a lot of tutorials out there about freezer paper stenciling (links here, video here, or here), so I'm not going to bother explaining the basics, just how you can make a rather simple process more complicated.  I've noticed that most freezer stenciled projects on the web are rather straightforward one-color affairs, and I wanted something a bit more exciting and complicated.

(Because I'm all about complicated.  The more complicated something is, the more I like it.  Why do things the easy way when you can do it the hard way?)

This is a regular tee that I purchased on sale last year for Miss Boo.  It had a pocket on the front which was getting in the way of my stencil, so first I carefully removed it with a seam ripper.

Here is my image, which I shamelessly stole from Google Images (I just did a search for "Hello Kitty Image".)


I copied it and then stretched it to fit a 8x10 piece of paper, which I then printed out.  It's a good idea to print out a few extras in case you make a mistake.  If you're really clever you can print it directly onto the matte side of the freezer paper that you have already cut into a 8x10 paper size.  (See paragraph #2 above as to why I didn't do that.)

From there, I taped my printed image onto the matte side of the freezer paper, and using an exacto knife, cut out all the white parts.  Try to be careful not to cut anything else, and most importantly, SAVE THE BITS YOU ARE CUTTING OUT.  You might need them later.

For lighter colors, I'd recommend doing at least three coats, so don't get impatient and pull off your freezer paper right away.  Save your impatience for an intelligent purpose, like using your hair dryer to dry the paint quickly so you can get three coats onto the shirt in 10 minutes.  Once the paint is dry to the touch, carefully peel off the freezer paper.

For the next layer, I decided to do the light pink sections.  It doesn't particularly matter which sections you do first, but I find it's easier to do the largest parts first and then work your way down from there (do all of one color at the same time).

Using the same piece of paper as your first layer, cut it out onto another fresh piece of freezer paper.  The advantage to using the same paper over and over is that you're more likely to match up the different parts.  This time, ignore the white sections and only cut out the light pink sections.

Making sure that it's positioned in the line with the part you've already done, iron it onto the shirt and paint your color, again drying it with your hair dryer.

Repeat the process with whatever layers you have next.

Next comes my favorite part, adding all the bling and embellishments.  I happened to have a black puffy pen and a clear glitter puffy pen, so I used those to do the outlining and eyes, along with a blob of yellow for the nose.


I really like a bit of 3-D or texture, so I added the purple rosette by hand stitching it onto the shirt. 

Finally, I made two little bows with some leftover bits of ribbon I had on hand.  I used a glue gun to form the bow, and then hand stitched one of the bows to the shirt so it wouldn't fall off.


Now, although you should've dried the paint with your hair dryer, I would recommend letting the paint cure for at least 24 hours before using the shirt, and definitely waiting that long before washing it.  However, the great thing about this technique is that it doesn't wear out.  The shirt itself will wear out before the paint does (and believe me, my kids are hard on their clothes.)

So what did I do with that extra bow?  I glued a hair clip onto the back so that Miss Boo could have the same hair clip as her Hello Kitty!

Perfectly cute!


Thursday, December 15, 2011

Post Office Bliss

Post Office Bliss?  Bliss, you say? 

Yes.


Packaging and mailing stuff for Christmas can really be a breeze, especially if you're savvy about how you do it.

First, pop into your local post office (hopefully yours hasn't been closed), and - get this - skip the lines and go directly to the counter where Priority Mailing boxes are shelved.  Pick out an assortment just in case you're not sure which sizes you'll need.  Don't worry, they're free, you don't have to check in at the counter or wait in line, and you can feel blissfully smug as you waltz past the frustrated and stressed people waiting in line.

(Now, if you're truly on top of things you can even go online and have the postal carrier deliver your boxes directly to your door - for free, but then again, you'd miss the fun of waltzing past all the frustrated and stressed people waiting in line at the Post Office . . . one must have priorities, after all, and yes, the pun is fully intended.)

Next, go home and happily plunk all your precious Christmas goodies into your free boxes.  Once everything is packed nice and snug, go online to USPS.com (or you can click on the direct link here).

Make sure you have the destination selected properly, and then click on the "sign in" link.  At this point, you might need to fill out the information for setting up an online account.  It only takes a few minutes, and trust me, it's well worth your time.  Have a credit card handy for paying for your labels as well.

Next fill out your mailing information.  I like to click on the "notify recipient" link so that they know they have a package coming.  You can also click on the link that will inform you when your package is delivered.


At the bottom of the page you'll need to list the approximate weight of your package.  As long as you are mailing in a flat rate envelope or box, the amount doesn't have to be perfect.  You can get a close enough approximation from your bathroom scale.
After that, just follow the links for selecting your flat rate priority box/envelope (or priority mailing stamp if you know the exact weight of your package) and print out your label.  Once your printer has printed it out, cut out the label portion (keep the receipt part of the page for your records) and tape it onto your box.

Now here is another great thing about the post office.  You can schedule a pick up of your packages for the next day.  (Link here). Unless you're in a frantic rush to get your packages to the post office that exact day, just wait a few hours and let your friendly postal carrier get your package for you.  On the website you put down how many packages you have and exactly where they'll be so your carrier can find them for you.  When he or she does pick them up, they'll leave you a notification so you know the packages were received.

No waiting in long lines!  No having to deal with snarky over-worked postal employees who are the verge of going postal!

(Along with asking your carrier to drop off free boxes, you can also order stamps online and have them delivered to your door as well!)

Wednesday, July 13, 2011

Vinyl Deck Chair Covers Tutorial


Aldi was selling some deck chair cushions for a fantastic price, so I picked up three for my deck furniture.  Last year, however, the neighborhood cats were using my deck chairs as their personal lavaratory and I had to throw out the old cushions.

This year, to deter the cats and to help the cushions stay dry in case of storms I decided to sew clear "pillow cases".

From JoAnn's I purchased clear vinyl (usually used to cover tablecloths) and cut it into a large rectangle. I measured the length of the cushion (including the "fatness" of the cushion) along with the width.  I doubled the width and added an extra inch to the width and about 8 inches to the length of the final cut, using a marker to help me cut straight lines.

If you're going to sew vinyl I'd recommend getting a leather or vinyl sewing needle, as it's very sturdy and will help your machine .

I folded my large vinyl sheet in half and sewed one end that would be the top of the cushion, and down the side of the case (the vinyl is folded so that the fold is on the other long side of the case).

Be sure to set your stitch width quite wide, because if the stitches are too close together they will just create a perforated line where the vinyl will easily tear.

Once you're done, turn your covers inside out (so the seams are inside the case) and slip your cushions into them! 

I left the bottom of the case open and folded them under the cushion.  If I were a more particular seamstress I would have done something professional to the bottom like adding a zipper or snaps.

I fold them under.  It's the way I do things.

Besides, I'd rather spend the time sitting in the chair enjoying my porch than fussing with zippers or snaps.

Friday, January 7, 2011

Card Refashion (or "Boxing Day" Crafting Style)


Christmas cards are so special, and it always seems like such a waste to throw them away after they've served their decorative purpose on my mantle.

(I don't actually have a mantle, but when speaking of things Christmassy a mantle is expected).

So, instead of chucking your old cards willy nilly into the trash bin, turn them into adorable boxes perfect for jewelry or candy!

All you need is scissors, a pencil, a pretty card, and some tape.


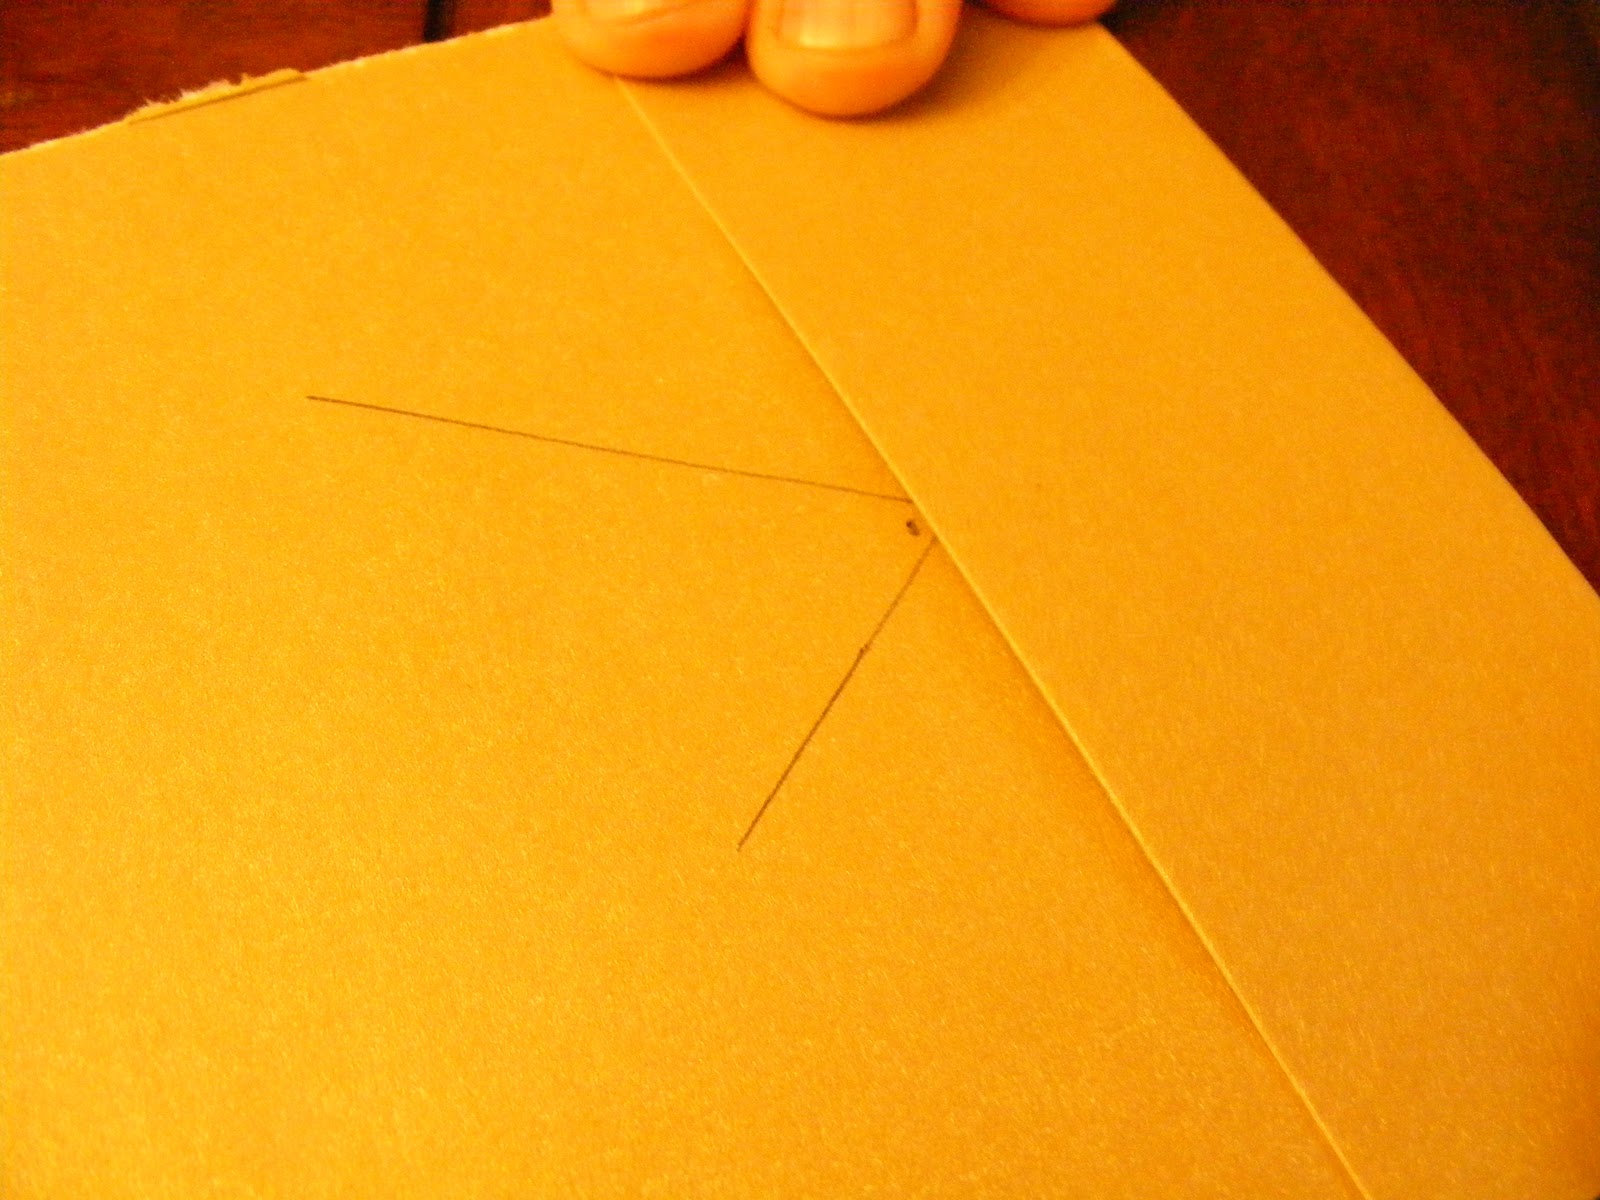
To begin, open the card and tear into two pieces, one piece being the front (this will be the top box) and the back.  You should have two identically sized rectangles.  Mark a small X in the center of the card.

You can easily do this by laying a ruler (or the edge of a piece of paper) diagonally across each corner.  Use a pencil to mark the X so you can erase it later.

Place the card right side facing down, and fold each of the four sides to the X, trying to make the crease as sharp as possible.

Cut along the line you just folded, rather in the shape of an H.  You aren't cutting the corner squares out, just cutting towards the center.
 
 
Fold up the sides, and if the end tab is longer, fold it inside the box.  Affix with tape and erase the X on the inside of the box.

Do the same for the other side, and you have your box!

Now, to make the bottom box, you'll need to make it just a tad bit smaller.  Make the bottom exactly like the top, except fold the edges a little bit past the center X.  It helps to mark it first with a small dot.

That's it!

Credit should go where credit is due, and I ought to say that I was taught how to do this by the Memphis Man (my uncle).  I recorded it on video, so you can watch him make it.  

Beware, I filmed this on New Year's Day, which, as you know, is a scant few hours after New Year's Eve.  
I will leave it at that . . . . .